Edit: See attachment at bottom of this thread for a PDF version done by Dave Z. Thanks Dave!!
Over the summer I got a call from a fellow member asking if I might be interested in taking a look at his acquaintances' 1953 Corvette Tung-Sol #632 flasher that went inoperative.
The flasher is used for the Park Brake Warning Lamp. When the Park Brake is applied, the Jewel light in the center of the speedometer Head area is supposed to flash repeatedly. The GM Part# of the flasher is 3705522.
The failure was that when the Park Brake was applied, the warning lamp would illuminate, but would not flash.
I got home from my northern trip in mid October. I finally had some time to look at the failing flasher and I got it here the day before Thanksgiving. The next morning after Turkey Day, I opened the box it came in and there it was..... A rare 1953 flasher.
Since it was a 6V flasher, in order to test it I got my old 6v/12v Motorcycle battery Charger out of storage.
20231124_054541.jpg
I also had to find a 6v bulb to properly test the flasher. I found the 1953 Lamp Data specs in the AMA file at GM Heritage Information kits site. The Park Brake Warning Lamp used a #82 bulb. Here's the page from the AMA data.
1953BulbData_mod.jpg
I carefully opened the top cover of the flasher using my jeweler's screwdrivers. When I turned the cover over I saw the date code.... "12 52", December 1952. I suppose it's possible that is a Juian date. I.E. Day 12 or week 12 of 1952.
This appeared to be the original flasher for his 1953 Corvette. I was now a bit worried, but since it was non-functional, I decided to dig in deep.
20231123_201711.jpg
20231123_201721.jpg
I then carefully had to squeeze the outer female round contact clips to allow me to release the internal flasher assembly. A flasher is basically a simple relay, but the relay contacts are controlled by a tungsten wire element which stretches and cools with heat and cold cycles. When current passes through the wire it heats up, looses some of its strength and stretches. When it cools down it will shrink back to its previous original length.
Here's it is removed from the case. I inspected the internals and fine wire and nothing obvious. It had hope, I thought.
20231123_210313.jpg
Further research told me the #82 bulb used in the car is 6v and rated at 1.02 Amps. Fortunately I had a box of lantern bulbs handy and found that the PR12 is a 6v lamp rated at .5 Amps. So I took 2 and soldered them together in parallel to make a simulated #82 bulb for my testing. Here I just do a quick test of the bulb pair before testing the flasher with them.
My 6 volt power supply is a 1 amp charger so it was at it's max current which dropped the voltage down a bit on the voltmeter under load. I do have another 6v/12v battery charger, but it's rated at 150 Amps, big and heavy, and I didn't want to drag it from out back in my shop to the house garage where I was working. It was quite early in the morning and didn't want to wake the household.
My makeshift #82 bulb setup.
20231124_054733.jpg
So now I was ready. I connected the flasher up to the power source and the bulbs, and sure enough, the light illuminated, but no flash.
I then decided to clean the contacts of the relay. They are microscopic. Using a piece of 1000 grit sandpaper I carefully cleaned the contacts. I retested and got a few flashes. Progress! But now I had concerns about if my test bulb circuit and voltage were correct.
I just happened to have a Tung-Sol #619 flasher handy in my bag of C1 electrical items. I connected it up to the test circuit, and it flashed just fine. A 619 is also a 6v flasher, but with a slightly different spec as it's used in 1951/1952 Chevys, and 1952 Oldsmobiles. Those likely have a different flasher bulb spec, so I figured I was in good shape to dive into the 632 adjustment mechanism and see what I could do to make it work properly. I was really deep into it now.
I decided to open up my 619 and do some experimental tests on that one. This way I would feel better about working on a 632. I took the 619 out of its case and ran a quick test to observe operation. By the way the underside of the cover showed "5 54".
I experimented with it to see if I could make it flash differently. It did, and actually made it fail, lamps lit, but no flash. I did this by bending the wire bracket and the underside contactor bar. Then I set it back to flashing properly. Then I disconnected and connected power a few times. Still good.
I then decided with confidence and went into the 632. I carefully adjusted the small bracket which holds one end of the tungsten wire. In order to do this I had to push the contactor down on the opposite end L-bracket to release the tension of the wire. This end is connected to the flat contactor spring. When it pivots downward, it makes the contacts close, and loosens the wire to allow some adjustment.
Here's a description of the internals.
632_InternalAssembly.jpg
I held the left end L-bracket down with my left hand and thumb to relieve wire tension. Then using tiny needle nose pliers in my right hand, I bent the adjustment wire bracket(right side in above image) ever so slightly outward. I then released the other end L-bracket I was holding with my left hand. This added a bit more tension on the wire to attempt to make it flash more rapidly.
I then trial tested the flasher.
It was working, but seemed a bit slow. I adjusted it again.
At this point I was happy and re-assembled it for one last test. I was done.
I let it flash for several minutes. All was good. Then I left it for a while and repowered up. It flashed properly for a long while. Then I called success.
I'm hoping it will continue to work when it gets reacquainted with its 1953 Corvette. I've never worked on one of those years before. I guess I can say I have now!
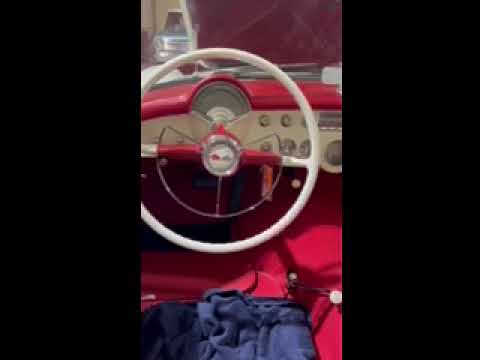
Edit:10/27 - It went back in the car today. It works. The engine is missing a few vitals so it can't be run just yet, but I suspect when it runs and the generator is in charge mode, the electrical system voltage will be in the 7 to 8 volt range, similar to my bench test source supply. I'd expect the flash rate to be a bit faster. If you turn up the volume, you can even hear the .... Ting...Ting...Ting of the flasher in its Park Brake holder bracket. I like that sound.
Rich
====
Over the summer I got a call from a fellow member asking if I might be interested in taking a look at his acquaintances' 1953 Corvette Tung-Sol #632 flasher that went inoperative.
The flasher is used for the Park Brake Warning Lamp. When the Park Brake is applied, the Jewel light in the center of the speedometer Head area is supposed to flash repeatedly. The GM Part# of the flasher is 3705522.
The failure was that when the Park Brake was applied, the warning lamp would illuminate, but would not flash.
I got home from my northern trip in mid October. I finally had some time to look at the failing flasher and I got it here the day before Thanksgiving. The next morning after Turkey Day, I opened the box it came in and there it was..... A rare 1953 flasher.
Since it was a 6V flasher, in order to test it I got my old 6v/12v Motorcycle battery Charger out of storage.
20231124_054541.jpg
I also had to find a 6v bulb to properly test the flasher. I found the 1953 Lamp Data specs in the AMA file at GM Heritage Information kits site. The Park Brake Warning Lamp used a #82 bulb. Here's the page from the AMA data.
1953BulbData_mod.jpg
I carefully opened the top cover of the flasher using my jeweler's screwdrivers. When I turned the cover over I saw the date code.... "12 52", December 1952. I suppose it's possible that is a Juian date. I.E. Day 12 or week 12 of 1952.
This appeared to be the original flasher for his 1953 Corvette. I was now a bit worried, but since it was non-functional, I decided to dig in deep.
20231123_201711.jpg
20231123_201721.jpg
I then carefully had to squeeze the outer female round contact clips to allow me to release the internal flasher assembly. A flasher is basically a simple relay, but the relay contacts are controlled by a tungsten wire element which stretches and cools with heat and cold cycles. When current passes through the wire it heats up, looses some of its strength and stretches. When it cools down it will shrink back to its previous original length.
Here's it is removed from the case. I inspected the internals and fine wire and nothing obvious. It had hope, I thought.
20231123_210313.jpg
Further research told me the #82 bulb used in the car is 6v and rated at 1.02 Amps. Fortunately I had a box of lantern bulbs handy and found that the PR12 is a 6v lamp rated at .5 Amps. So I took 2 and soldered them together in parallel to make a simulated #82 bulb for my testing. Here I just do a quick test of the bulb pair before testing the flasher with them.
My 6 volt power supply is a 1 amp charger so it was at it's max current which dropped the voltage down a bit on the voltmeter under load. I do have another 6v/12v battery charger, but it's rated at 150 Amps, big and heavy, and I didn't want to drag it from out back in my shop to the house garage where I was working. It was quite early in the morning and didn't want to wake the household.
My makeshift #82 bulb setup.
20231124_054733.jpg
So now I was ready. I connected the flasher up to the power source and the bulbs, and sure enough, the light illuminated, but no flash.
I then decided to clean the contacts of the relay. They are microscopic. Using a piece of 1000 grit sandpaper I carefully cleaned the contacts. I retested and got a few flashes. Progress! But now I had concerns about if my test bulb circuit and voltage were correct.
I just happened to have a Tung-Sol #619 flasher handy in my bag of C1 electrical items. I connected it up to the test circuit, and it flashed just fine. A 619 is also a 6v flasher, but with a slightly different spec as it's used in 1951/1952 Chevys, and 1952 Oldsmobiles. Those likely have a different flasher bulb spec, so I figured I was in good shape to dive into the 632 adjustment mechanism and see what I could do to make it work properly. I was really deep into it now.
I decided to open up my 619 and do some experimental tests on that one. This way I would feel better about working on a 632. I took the 619 out of its case and ran a quick test to observe operation. By the way the underside of the cover showed "5 54".

I experimented with it to see if I could make it flash differently. It did, and actually made it fail, lamps lit, but no flash. I did this by bending the wire bracket and the underside contactor bar. Then I set it back to flashing properly. Then I disconnected and connected power a few times. Still good.
I then decided with confidence and went into the 632. I carefully adjusted the small bracket which holds one end of the tungsten wire. In order to do this I had to push the contactor down on the opposite end L-bracket to release the tension of the wire. This end is connected to the flat contactor spring. When it pivots downward, it makes the contacts close, and loosens the wire to allow some adjustment.
Here's a description of the internals.
632_InternalAssembly.jpg
I held the left end L-bracket down with my left hand and thumb to relieve wire tension. Then using tiny needle nose pliers in my right hand, I bent the adjustment wire bracket(right side in above image) ever so slightly outward. I then released the other end L-bracket I was holding with my left hand. This added a bit more tension on the wire to attempt to make it flash more rapidly.
I then trial tested the flasher.
It was working, but seemed a bit slow. I adjusted it again.
At this point I was happy and re-assembled it for one last test. I was done.
I let it flash for several minutes. All was good. Then I left it for a while and repowered up. It flashed properly for a long while. Then I called success.
I'm hoping it will continue to work when it gets reacquainted with its 1953 Corvette. I've never worked on one of those years before. I guess I can say I have now!
Edit:10/27 - It went back in the car today. It works. The engine is missing a few vitals so it can't be run just yet, but I suspect when it runs and the generator is in charge mode, the electrical system voltage will be in the 7 to 8 volt range, similar to my bench test source supply. I'd expect the flash rate to be a bit faster. If you turn up the volume, you can even hear the .... Ting...Ting...Ting of the flasher in its Park Brake holder bracket. I like that sound.
Rich
====


")
Comment