The following is a design to reduce the high current through the rollover switch. Instead of the 12+ amps going through the switch, the relays do all of the work passing the high current. After this modification, the switch will only need to pass about 0.12 amps in either motor direction.
The box can be mounted under the dash and plugs into the existing harness without cutting any wires. The only addition is connecting the box ground wire to a ground point under the dash. The ground is for the 2 relay coils.
The video below is a bench test verification of the relay box using two motors and the rollover switch and also explains details where you can get the parts to do this modification. I got most of the parts from Zip and Amazon. The special 3 pin harness receptacle is available, as is the 3 prong plug which can be made from a C3 power window switch. This switch uses the same pin profile as the rollover switch pinout but needs a bit of rework and insulator sleeves.
A pictorial parts list follows so you can make your own if desired.
Schematic:
Use this to modify the relay box wiring. The relay box is configured differently and needs to be rewired.


Relay box(after mods)

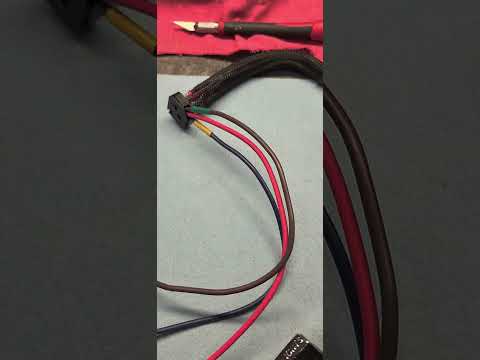
C3 Power window switch. Take it apart and use the 3 pin connector, round the edges and solder to it and to the added wires to the relay box. This plugs into the dash harness. I got these from Amazon.


Harness plug assembly. Zip or Amazon.


Dual Relay box. Amazon.

I recently installed the relay box into a friend's 1967 convertible. His switch has been intermittent and he's been struggling for a while to operate the motors. Over time it has been harder to activate the switch.
I pulled the main harness plug from the switch. To remove the harness plug, carefully push the lock tabs aside and use a small screwdriver to pry the plug from the switch.
I opened this switch to clean and adjust the contacts, for the last time. The relays will lengthen the life of the switch forever. To perform this contact cleaning process, see this document. Here.
I connected the relay box male plug to the main harness, then the female receptacle on to the switch, attached the box ground terminal, then I reinstalled the switch back in to the dash.
It now rolls the headlight buckets up and down with a very light touch of the switch. He likes the sound of the relays doing all of the work.
Here's a short video of the installation...
A few photos of the installation below.
Plugging in the box in series with the harness and the switch.
image.png
I attached the relay box ground wire terminal to the headlight motor circuit breaker mount screw and used tie-wraps to attach it up high to the main harness above the fuse panel.
Area above the fuse panel.
This car has power windows and Speed Minder options. Note the box black ground wire under the left circuit breaker mount screw.
image.png
The box can be easily moved around to access fuse panel, or removed entirely if getting your car judged.
It worked as expected and will prevent the carbon build up on the switch contacts, indefinitely.
Rich
The box can be mounted under the dash and plugs into the existing harness without cutting any wires. The only addition is connecting the box ground wire to a ground point under the dash. The ground is for the 2 relay coils.
The video below is a bench test verification of the relay box using two motors and the rollover switch and also explains details where you can get the parts to do this modification. I got most of the parts from Zip and Amazon. The special 3 pin harness receptacle is available, as is the 3 prong plug which can be made from a C3 power window switch. This switch uses the same pin profile as the rollover switch pinout but needs a bit of rework and insulator sleeves.
A pictorial parts list follows so you can make your own if desired.
Schematic:
Use this to modify the relay box wiring. The relay box is configured differently and needs to be rewired.
Relay box(after mods)
C3 Power window switch. Take it apart and use the 3 pin connector, round the edges and solder to it and to the added wires to the relay box. This plugs into the dash harness. I got these from Amazon.
Harness plug assembly. Zip or Amazon.
Dual Relay box. Amazon.
I recently installed the relay box into a friend's 1967 convertible. His switch has been intermittent and he's been struggling for a while to operate the motors. Over time it has been harder to activate the switch.
I pulled the main harness plug from the switch. To remove the harness plug, carefully push the lock tabs aside and use a small screwdriver to pry the plug from the switch.
I opened this switch to clean and adjust the contacts, for the last time. The relays will lengthen the life of the switch forever. To perform this contact cleaning process, see this document. Here.
I connected the relay box male plug to the main harness, then the female receptacle on to the switch, attached the box ground terminal, then I reinstalled the switch back in to the dash.
It now rolls the headlight buckets up and down with a very light touch of the switch. He likes the sound of the relays doing all of the work.
Here's a short video of the installation...

A few photos of the installation below.
Plugging in the box in series with the harness and the switch.
image.png
I attached the relay box ground wire terminal to the headlight motor circuit breaker mount screw and used tie-wraps to attach it up high to the main harness above the fuse panel.
Area above the fuse panel.
This car has power windows and Speed Minder options. Note the box black ground wire under the left circuit breaker mount screw.
image.png
The box can be easily moved around to access fuse panel, or removed entirely if getting your car judged.
It worked as expected and will prevent the carbon build up on the switch contacts, indefinitely.
Rich

Comment